When you want to post a vlog, it’s common to insert some music into it. But you may want to put your own recording into the video. Recording your voice is simple, but editing it requires more technical operations, including removing unwanted sections, adding some effects, adjusting the speed of your audio, or joining multiple recordings into one. Do you know how to edit an audio recording on a computer and phone? In this passage, we will show you the way to do it. Let’s get started!
Most Android smartphones have a specialized app to record. But the audio quality is simple. Depending on the model and version you're using, the layout and quality may change, but they usually include other standard features like trimming.
Step 1 Open the default voice recording app on your phone.
Step 2 Click on it to play it.
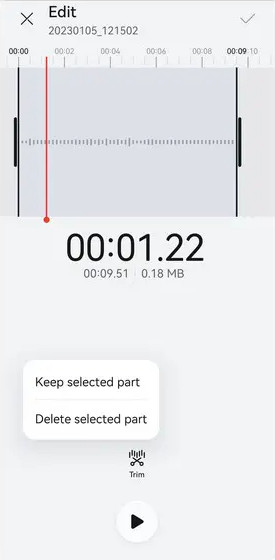
Step 3 Click on the button at the top right corner of the phone screen.
Step 4 Drag the black line to the start and end position you want.
Step 5 Click the tickle on the top right corner to save the file.
Note: If you can’t find any record app on your phone, you can search and download it from the Google Play Store.
As we mentioned, the default voice recording app may not have a great audio quality. But before recording, we can adjust the settings to get a better quality. Here are the steps to record on Android before editing.
Note: Here we use a Samsung Galaxy phone to show the instructions, it may be a little bit different from any other brand of smartphones. But the general function should be similar.
Step 1 Open the Voice Recorder app.
Find the Voice Recorder app on your Android device and tap to launch it. If you cannot find it, you can Swipe Up from your Android’s home screen, and type Voice Recorder in the search box. Or you can tap Settings > Apps, then search for Voice Recorder.
Step 2 Choose the recording mode.
There are three modes you can choose: Standard, Interview, or Speech-to-text recording modes.
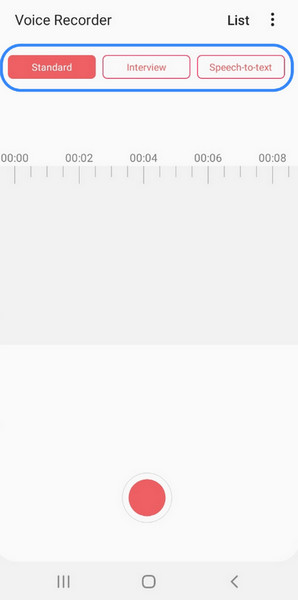
Standard mode: It offers a simple interface and the basic functions for audio recording.
Interview mode: It utilizes advanced microphones and audio processing algorithms to improve the clarity and quality of recorded audio during interviews. It can enhance the audio recording experience and capture clear and distinct voices by using your device's top and bottom mics.
Speech-to-text (STT) mode: Records your voice and simultaneously transcribes it to on-screen text. It has a maximum recording time of 10 minutes. You should keep your Android device within 3 inches of your mouth for best results, and speak clearly. It helps you dictate messages, emails, documents, or any other text input without needing to type on the keyboard, making it convenient for hands-free text input.
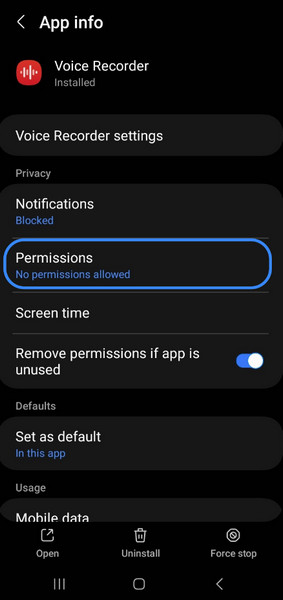
Step 3 Give the permissions
Give permission to the audio and microphone if it’s your first time using Voice Recorder. Tap the Settings and then click on Permissions.
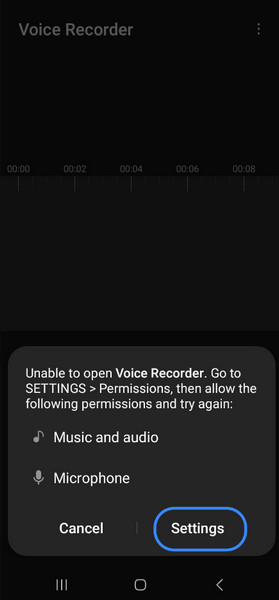
Next, tap “Microphone” and select Allow only while using the app or Ask every time.
Step 4 Adjust your settings
Tap the three dots in the right top corner. Then select “Settings” to access voice recording settings.

You can choose different settings of the voice recording app:
1. Recording quality: You can choose between Low (64kbps, 44.1kHz), Mid (medium) (128kbps, 44.1kHz), or High (256kbps, 48kHz) recording quality.
2. Block calls while recording: It’s annoyed a sudden call comes in when you are recording. You can turn on this setting, and it will display a Call reject icon next to the timer during recording, and will automatically reject incoming calls.
3. Auto play next recording: It can automatically play the next audio recording.
4. Recycle bin: It can keep deleted audio recordings on your device for 30 days to prevent you change your idea to recover them. If you disable the setting, all recordings in the Recycle bin will be deleted.
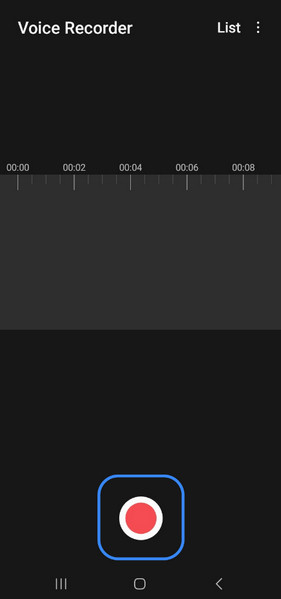
Step 5 Start recording
Tap the red Record button at the bottom of your screen to start recording your audio. If you want to stop the recording, you can tap the Pause button to stop the recording, then tap it again to resume recording.
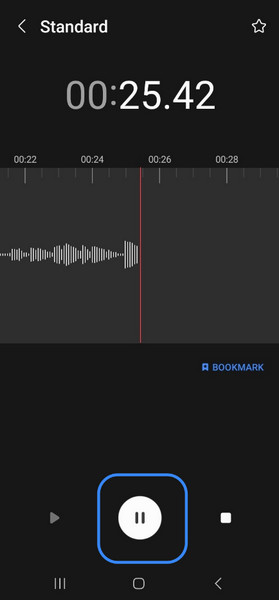
Step 6 Save your audio file
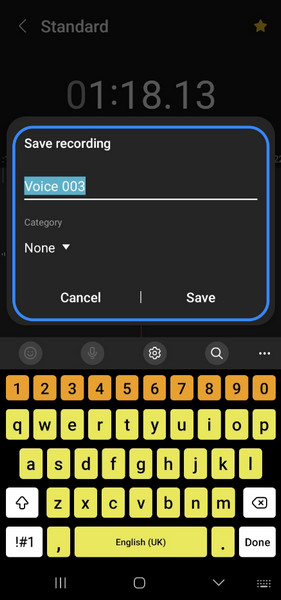
When you’re done recording, tap the Stop button. You’ll be prompted to save your recording. Name the audio file, and then tap “Save”.
For iPhone users, a free option to edit recordings is to use the Voice Memos. With it, you can record a sound and then directly edit it within this app. Here are the steps to edit recorded audio in Voice Memo.
Step 1 Open Voice Memos on your iPhone. Tap the audio you want to edit.
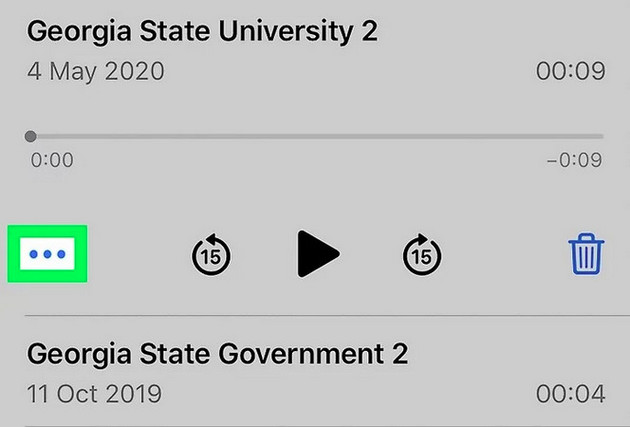
Step 2 Tap three dots in the lower left corner, then a menu will pop up.
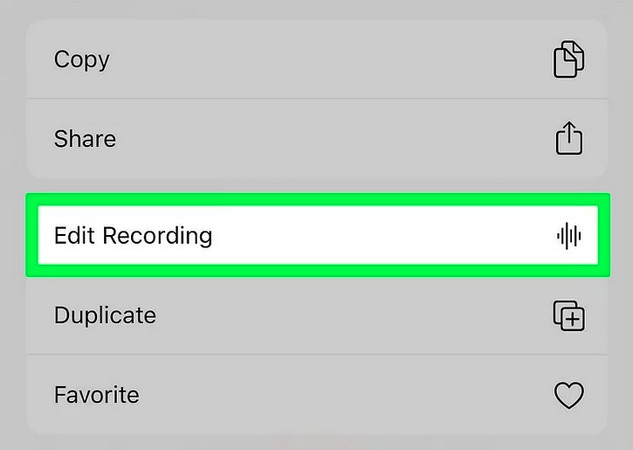
Step 3 Tap Edit Recording to open the audio file you want to edit.
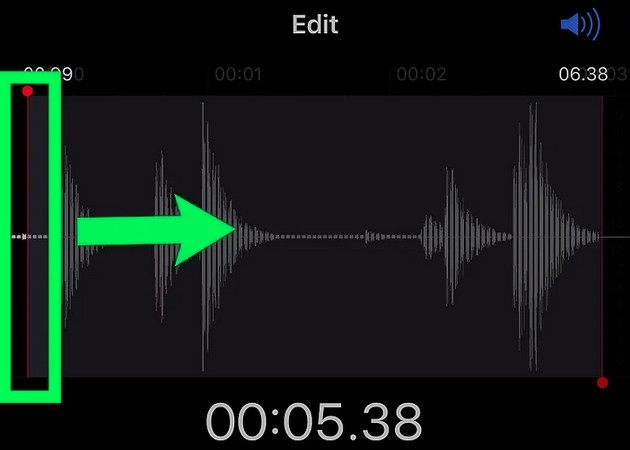
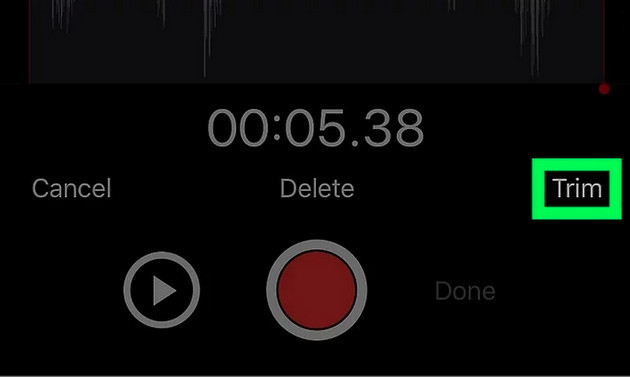
Step 4 Click on the crop icon in the lower right corner. Drag the red bars on each side to the start and end position you want. You can hear a preview at any time by tapping the Play button at the bottom center.
Step 5 Click on Trim to cut the part you choose.
Step 6 Tap Save to save your file.
For Windows users, one of the most straightforward ways to edit an audio recording or any downloaded music should be using- Sidify Apple Music Converter. This program features a suite of advanced tools within its framework, including AA/AAX Converter, AI Audio Splitter, Audio Converter, Tags Editor, and CD Burner. They are all built-in tools, so you don’t have to download any other software to do different operations. Also, it can Convert Apple Music to MP3, AAC, FLAC, WAV, AIFF, or ALAC.
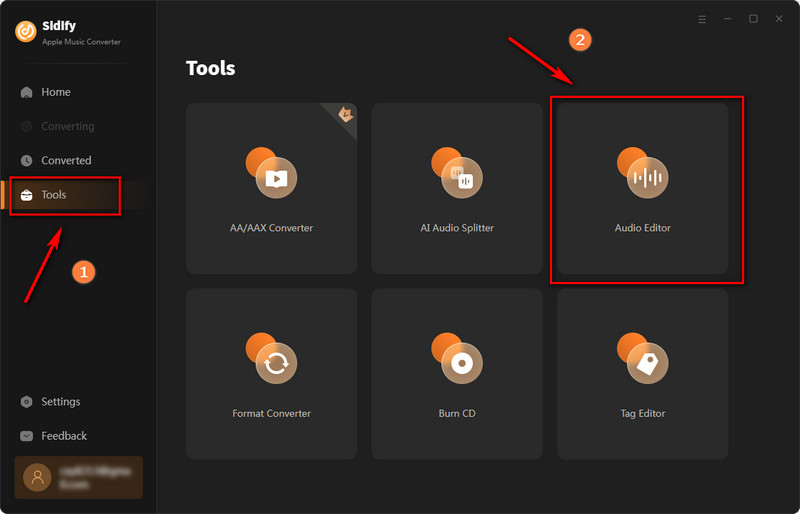
Step 1 Launch Sidify Apple Music Converter. Go to Tools > Audio Editor.
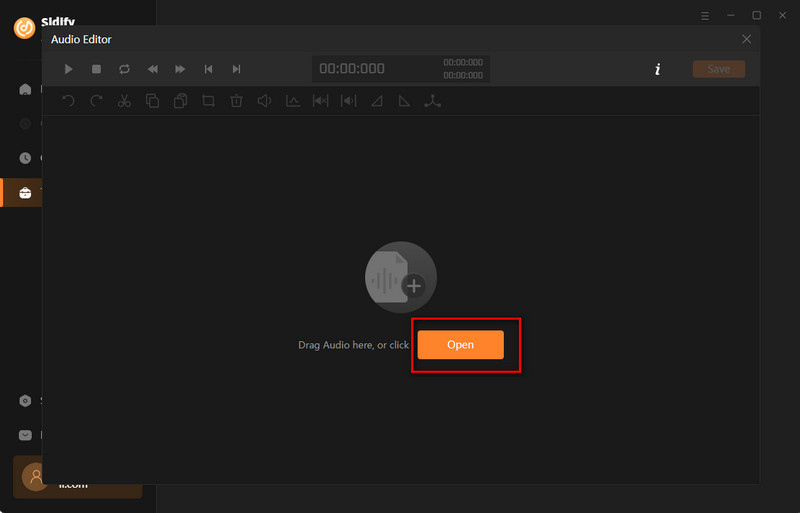
Step 2 Drag the audio you want to edit. Or simply click Open to open it.
Step 3 Select the part you want. Then you can Cut, Copy, Paste, Crop, or Delete it.
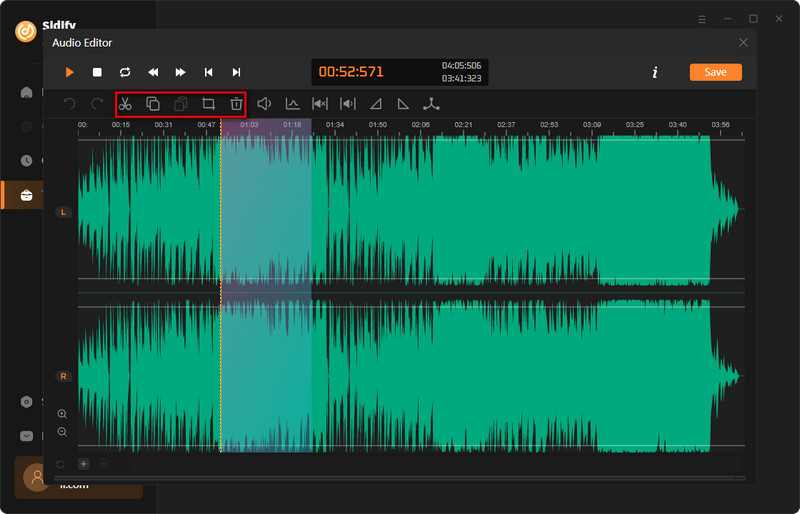
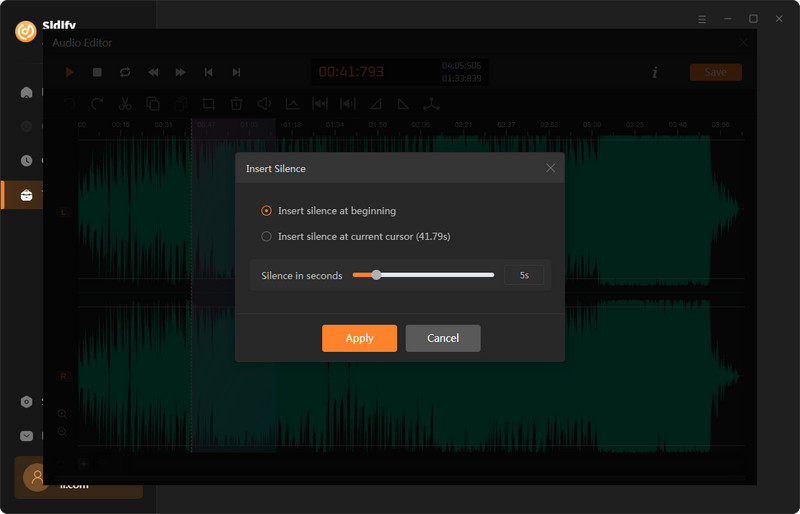
Step 4 If you want your audio more attractive, you can also choose Gain, Normalize, Insert Silence, Remove Silence, Fade in, Fade out, or Speed UP/Slow Down.

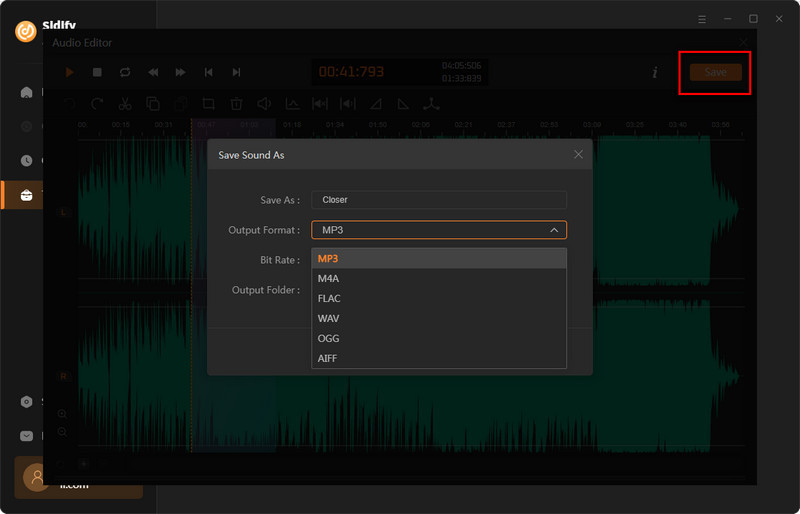
Step 5 Now tap Save to save your edited audio file. You can also click on Output Format to save them as your preferred formats.
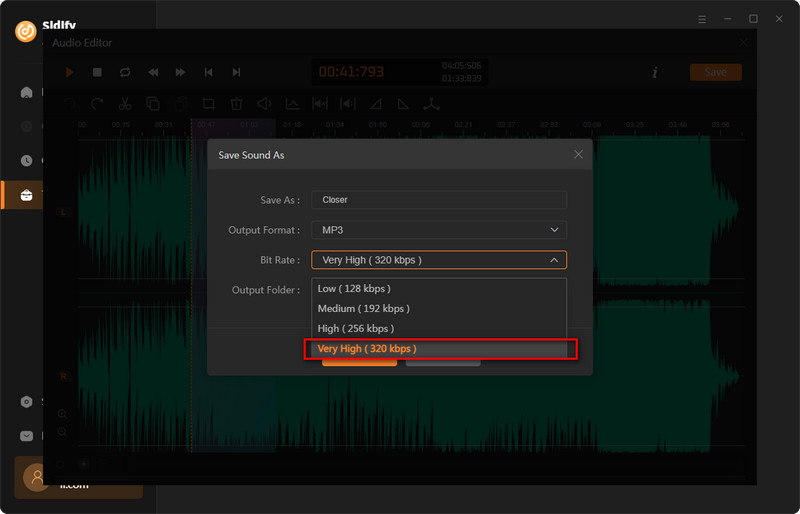
You can also choose different bit rates as you want.
If you are a Mac owner, you can take full advantage of the Voice Memos app’s built-in editor.
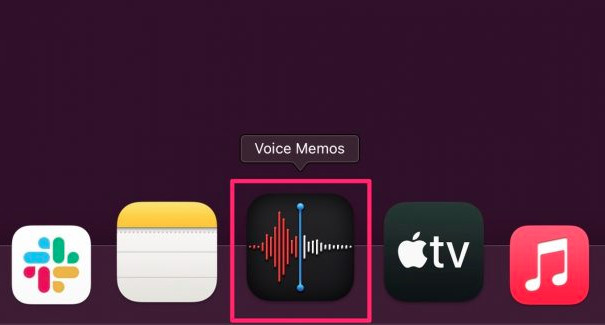
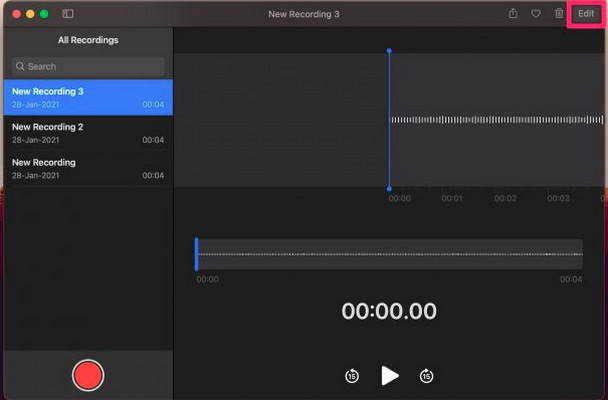
Step 1 Launch the Voice Memos app on your Mac.
Step 2 Select the recording that you want to edit from the left panel. Next, click on Edit located at the top right corner.
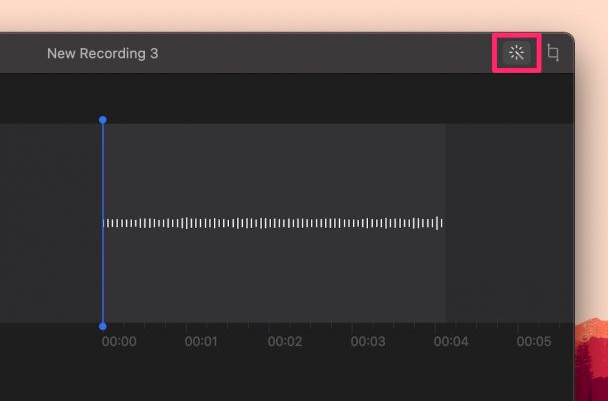
Step 3 Now you are accessible to the audio timeline. You can click on the magic wand icon at the top-right corner to automatically enhance the audio recording.
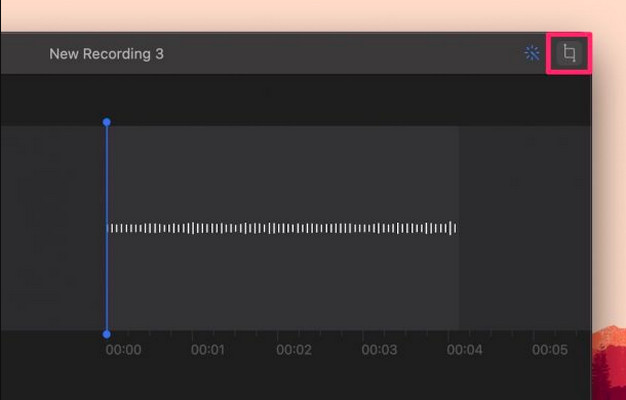
Step 4 Clicking on the crop icon at the upper-right corner to trim the part you want.
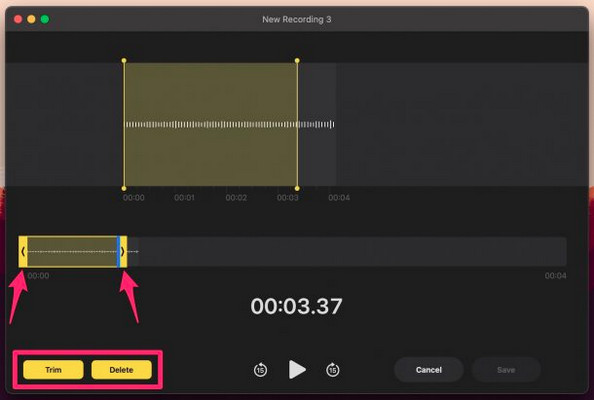
Step 5 You can drag the ends to select the portion of the recording that you want to trim. Click on Trim if you want to remove the part that’s not highlighted. Choosing Delete will remove the highlighted portion instead.
Note: If you want to revert any of your changes, you can click on Edit from the menu bar and then choose Undo from the dropdown menu. When you’re done editing, tap the Save option to overwrite the original recording.
With editing your recordings, you may face limitations when trying to edit other music in Apple Music. Don't worry. Sidify Apple Music Converter provides a solution by downloading songs from Apple Music in multiple different formats including MP3, AIFF, WAV, FLAC, AAC, ALAC, and more. This way meets your need for transferring Apple Music across devices and streaming platforms without restrictions.
When you download Apple Music tracks for offline playback, the Music app saves the audio files to your device's storage. These data are kept in a cached location from streaming and are encrypted for protection. In contrast, the Sidify Apple Music Converter downloads and saves all of Apple Music as open-source individual files to local storage for various personal needs.

If you want a tool to convert any streaming music (including Spotify, Apple Music, Amazon Music, Tidal, Deezer, YouTube, YouTube Music, SoundCloud, DailyMotion …) to MP3, Sidify All-In-One is the go-to choice.
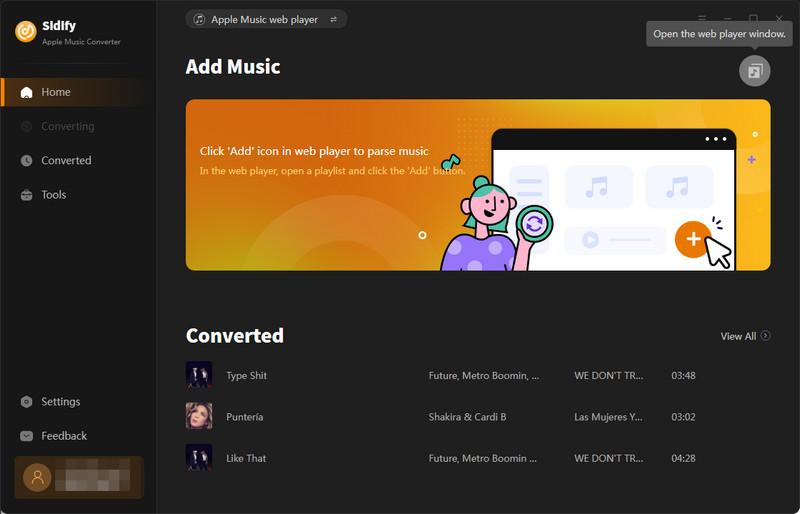
Step 1 Download and Run Sidify Apple Music Converter
Open Sidify Apple Music Converter on your computer and the Apple Music Web window will pop up simultaneously.
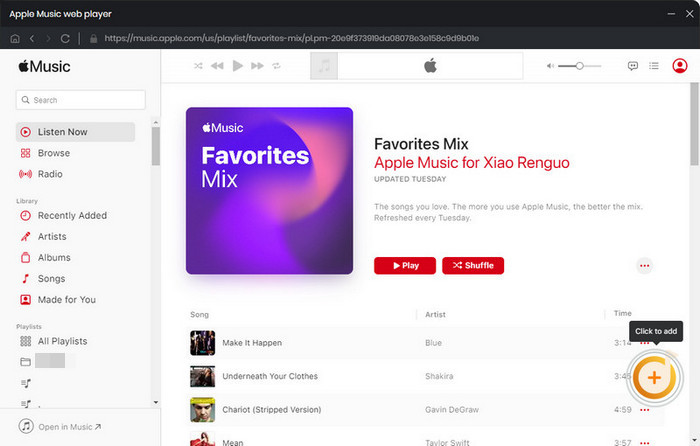
Step 2 Add Apple Music to Converter
Log into your Apple Music account on the web player window. Then open the playlist that you want to convert and download. By tapping the "Click to add" button at the bottom right corner, you can add them to the converter for the conversion preparation.
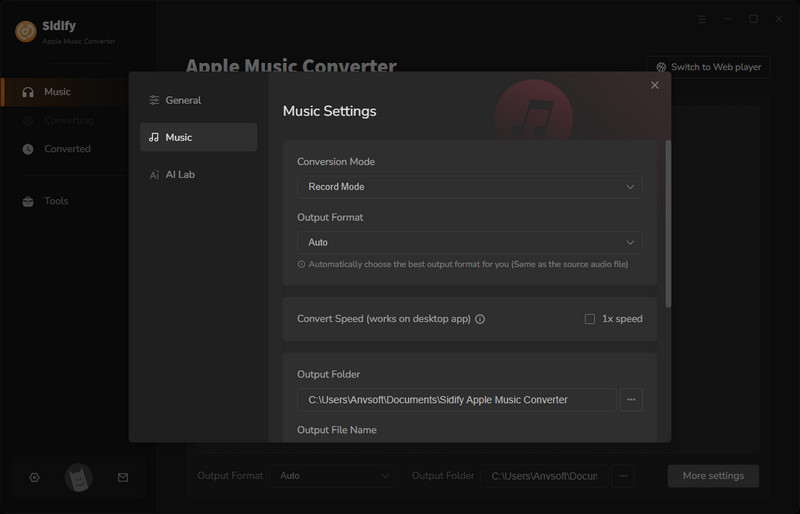
Step 3 Set up Apple Music Downloading Format
Go to the converter Settings menu, and set up the Apple Music output format to MP3 (for example). Also, customize the output sound quality and the output folder where to save the Apple Music downloads.
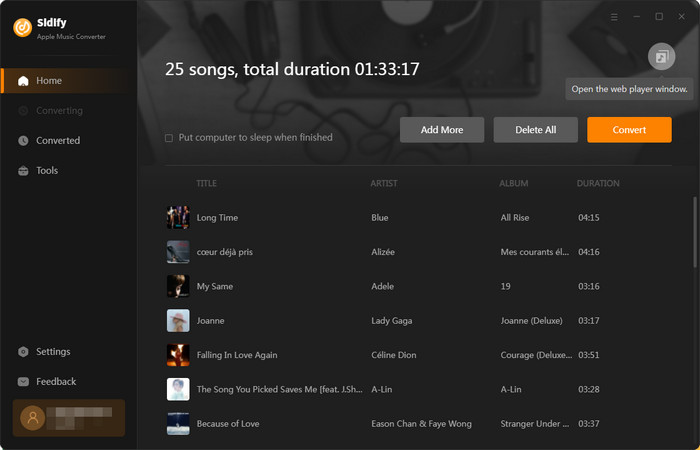
Step 4 Start to Download Apple Music
Back to the homepage, click the "Convert" button to start the conversion. Apple Music will be downloaded at a 10x faster speed with Sidify.
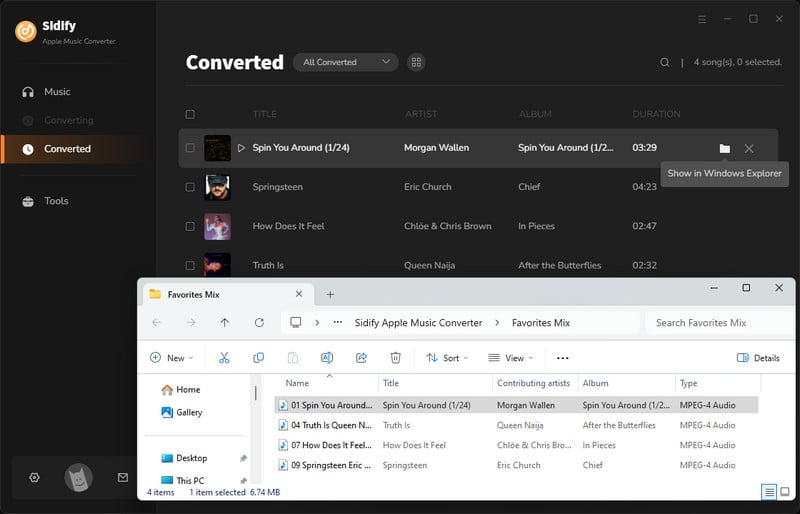
Step 5 Find All Songs Downloaded from Apple Music
When the conversion process is complete, head over to the Converted tab located on the left-hand side column. This will enable you to confirm which files have successfully been converted and where they are saved. Simply navigate to the output folder to find your Apple Music downloads, which will now be saved as .mp3 files.
Note: The trial version of Sidify Apple Music converter enables us to convert the first minute of each audio file. We need to purchase a license to unlock the time limitation.
Editing audio recordings is a creative process to enhance the quality and impact of your recordings. In this post, we showed different ways to edit recordings on both computers and phones. You can adjust your recording by the default apps on your phone or PC. If you want to insert silence or fade in some part of it, you can utilize Sidify Apple Music Converter to achieve your desired result. Also, it allows you to download Apple Music in different formats to your PC so that you don't have to worry about bad Internet. Take good use of Sidify Apple Music Converter, and enjoy your music anytime!

Harper North | Staff Writer