
Tesla has long been a pioneer in automotive entertainment. While it effortlessly supports Spotify, Apple Music users are left wanting. With a desire to sync Apple Music songs with Tesla rides, the demand for a solution has spread far and wide.
2022.44.25 Tesla Holiday Update marks a significant milestone as Tesla finally integrates Apple Music. But even with this official support, alternative methods exist, providing users with a plethora of options. In this post, we look at five simple ways to play Apple Music on your Tesla. From Bluetooth connections to third-party apps, we walk you through the steps to sync your sounds seamlessly. Apple Music enthusiasts! Join and find your groove on the road with Tesla now!
Tesla now has native support for Apple Music. Drivers can now directly enjoy the full Apple Music service on all Tesla vehicles. Notably, it's essential to have a subscription to Tesla's Premium Connectivity (monthly fee of $9.99) service to stream Apple Music over the cellular network. If you're on a tight budget, you can actually save money by getting Apple Music membership for free.
Step 1 Firstly, you need the 2022.44.25 Tesla Holiday Update (or later version) to access Apple Music.
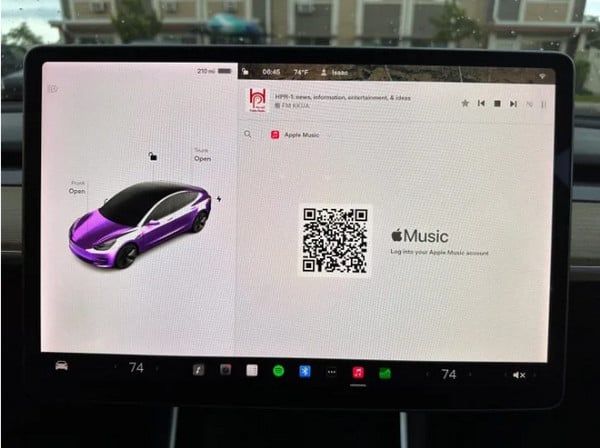
Step 2 Open the Apple Music app from the application launcher on your Tesla car's touchscreen.
Step 3 Scan the QR code with your iPhone. This will initiate an access request allowing Tesla to connect to your Apple Music account.
Step 4 Login with your Apple ID credentials to grant Tesla access to your Apple Music library.
Make sure your smartphone (e.g., iPhone) with Apple Music installed is ready and that Bluetooth is enabled. Also, ensure your Tesla's Bluetooth system is active and ready to pair.
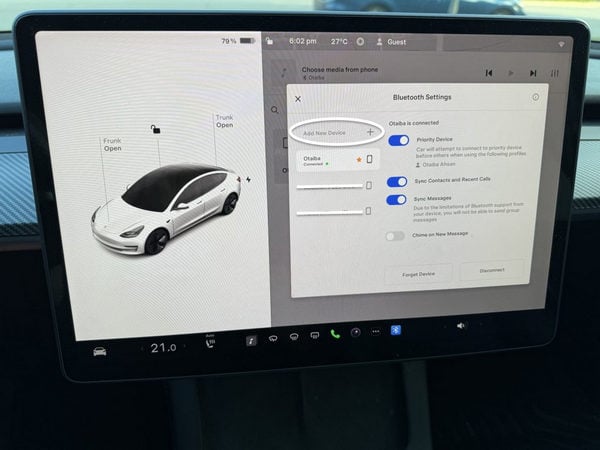
Step 1 On your Tesla's touchscreen, go to the Bluetooth settings. You may find this under 'Settings' > 'Bluetooth' or a similar menu. Activate Bluetooth searching or scanning mode.
Tesla Model 3 or Y: Tap on the Bluetooth icon in the top right corner of the touchscreen.
Tesla Model S or X: Tap on the 'Phone' icon at the bottom of the touchscreen, then tap 'Bluetooth'.
Step 2 On your iPhone, go to 'Settings' > 'Bluetooth' and select your Tesla car from the list of available devices. Follow any on-screen prompts to complete the pairing process.
Step 3 Once paired, open the Apple Music app on your iPhone and choose the song, album, playlist, or radio station you want to play.
Step 4 The audio should now play through your Tesla's sound system. You can control playback using the controls on your iPhone or through the Tesla's touchscreen interface.
Notes: Streaming music over Bluetooth can drain your smartphone's battery faster than usual, especially if the connection quality is poor or if you're using other apps simultaneously.
Some third-party developers have managed to mimic the CarPlay or Android Auto interface on Tesla's touchscreen. And here, we would like to introduce a workaround app to enable Android Auto to function on Tesla. And this way will provide Tesla owners with access to Android Auto features, such as Google Maps and the Apple Music app, directly project Android Auto using Tesla's built-in browser.
Step 1Firstly, connect your Android phone and Tesla to the same WiFi or Hotspot. Also, enable the Bluetooth on both sides and pair them.
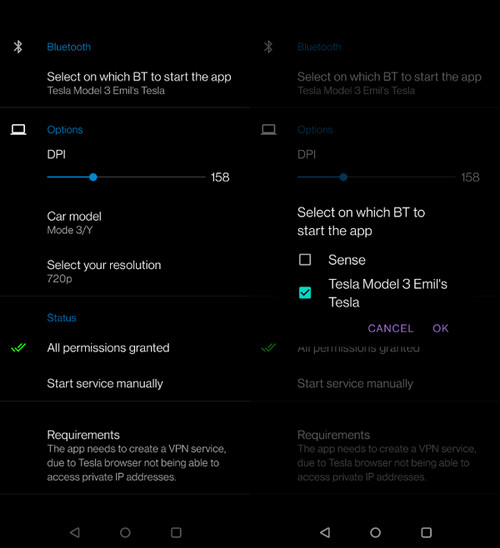
Step 2On your Android phone, download an app called TeslAA (for Android Auto) from the Google Play store.
Step 3Launch the TeslAA app on your Android phone, and agree to all permissions when prompted. And then select the Tesla Bluetooth to start the app as well as the 1080 solution.
Step 4 Keep the TeslAA app open, go to the Browser on the Tesla screen, and navigate to www.androidwheel.com. If your Android phone is successfully connected to the Wifi or Hotspot, the Android Auto will be projected on the Tesla touchscreen. All Android auto compatible apps should now be available on Tesla, including your Apple Music app!
Tesla cars can typically support USB drives. So you can put the downloaded Apple Music to a USB flash drive supported by your Tesla model. Also, make sure you store your songs in a supported audio format such as MP3, AAC, or FLAC. And for the Apple music conversion format issue, you can simply have Sidify Apple Music Converter work this out. This wonderful program allows you to download songs from Apple Music and convert Apple Music to diverse audio formats including MP3, AAC, ALAC, AIFF, WAV, and FLAC. All these audio files are accepted by the Tesla car stereo. The important feature is that Sidify saves all Apple Music downloads on the computer locally. As a result, transferring Apple Music to a USB stick is a straightforward process that allows Apple Music to play on Tesla.
Sidify Apple Music Converter

If you want a tool to convert any streaming music (including Spotify, Apple Music, Amazon Music, Tidal, Deezer, YouTube, YouTube Music, SoundCloud, DailyMotion …) to MP3, Sidify All-In-One is the go-to choice.
* If you don't see the "Choose Conversion Mode" option in Step 1, please check this page for more detailed instructions.
Step 1Choose Conversion Mode
Download and run Sidify Apple Music Converter, and select the Apple Music app mode to access the modern interface of Sidify:
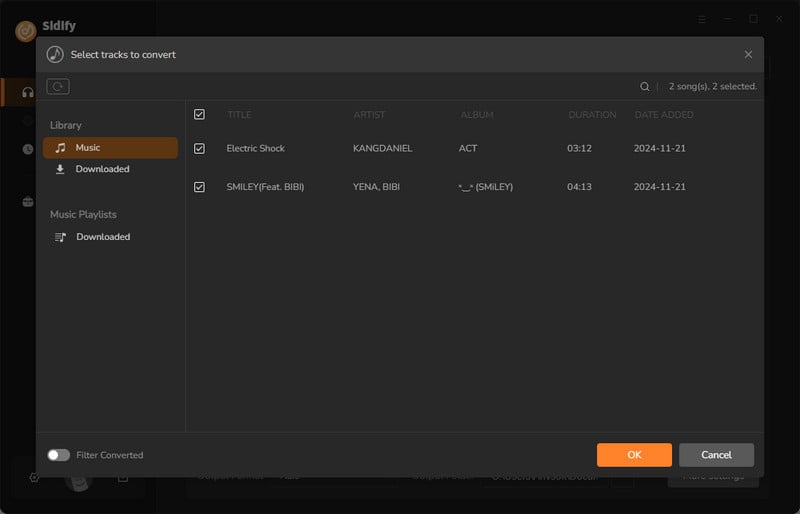
Step 2Add Apple Music Tracks to Sidify.
Drag and drop songs, an album, or a playlist from Apple Music to Sidify. Or you can click the "Add" button on the interface and copy & paste the URL of your Apple Music to the program. Then click the "OK" button to import them to Sidify.
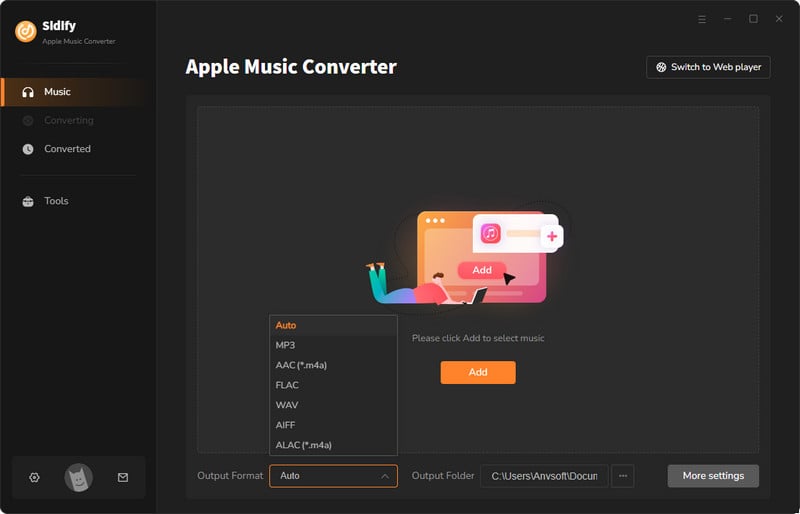
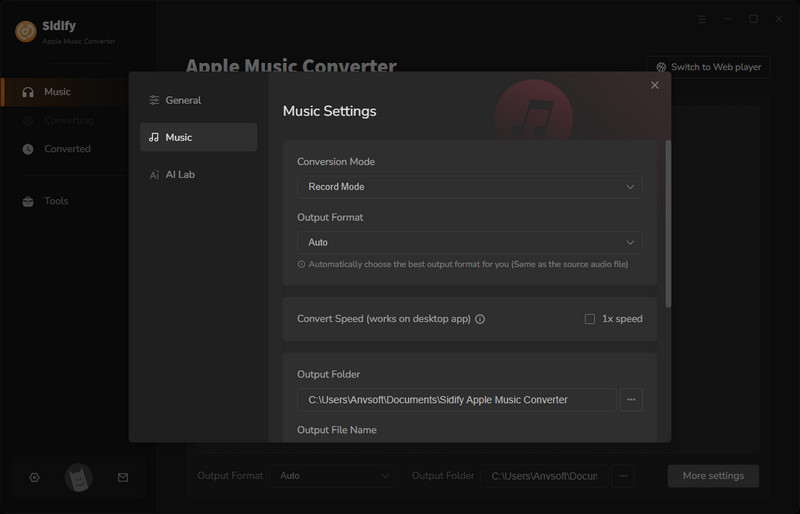
Step 3 Choose Output Format and Customize Output Path.
Click the Settings icon in the left panel. Here you can choose the output format (MP3/AAC/WAV/FLAC/AIFF/ALAC), the output quality, and the output path as well. Besides, you can customize how you'd like to name and sort out the converted files.
Step 4 Convert Apple Music to MP3.
Click the Convert button and Sidify will immediately start converting the Apple Music to MP3s.
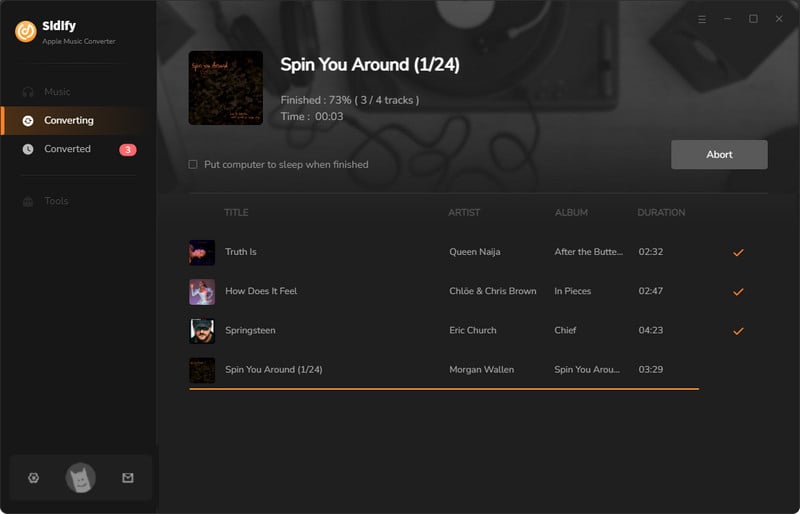
Step 5 Check Apple Music MP3 Downloads
When the downloading process reaches 100%, you can go to the Converted section and find all downloaded Apple Music MP3s. By tapping the folder icon, you can see all the Apple Music files saved locally on the computer.
Now, you can simply plug in your USB flash drive to the computer, and make a copy of the Apple Music downloads to the USB storage. If all is set up, you can simply play the Apple songs on Tesla through the USB drive.
Following method 4, you succeeded in exporting the Apple Music downloads to your computer locally. And go a further step, you can make the best use of Sidify Apple Music Converter to burn Apple Music to CDs. Then utilize an external portable CD player equipped with USB output. This setup enables you to play Apple Music via CD through the Tesla's speakers.
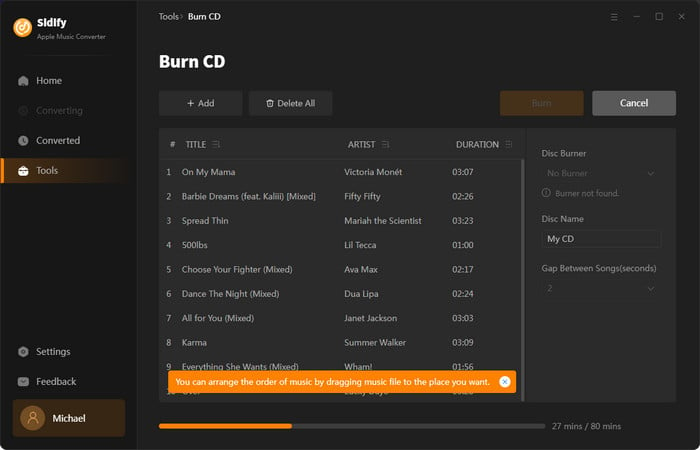
Step 1 Open the Sidify Music Converter and go to the "Tool" tab on the left panel. Then click on the "Burn CD" option.
Step 2 Insert a blank CD-R (CD-Recordable) disc into your computer's CD/DVD drive.
Step 3 Click the "Add" option and navigate to the output folder containing all the Apple Music downloads to add them to the converter. Arrange the song orders in the burn list by dragging and dropping them within the list.
Step 4Click on the "Burn" tab, Sidify Apple Music Converter program will begin burning the selected Apple music files to the CD.
Step 5 Once the process is complete, you will have a music CD that can be played in any standard CD player or your Tesla car stereo.
Step 1 Insert a blank CD into your Mac's optical drive or an external CD/DVD drive.
Step 2 Go to your Applications folder, then Utilities, and open Disk Utility.
Step 3 In Disk Utility, select "File" > "New Image" > "Blank Image". Name the image, choose where to save it, set the size, and click "Save".
Step 4 Drag your downloaded Apple music files into the mounted disk image window. Click "Burn" in Disk Utility's toolbar and follow on-screen instructions to burn the disk image to the CD.
Step 5 Once burning is complete, eject the CD from your Mac. If necessary, test the burned CD on your Mac or another CD player to ensure the music plays correctly.
To sum up, you Tesla owners have multiple different methods to enjoy Apple Music in Tesla vehicles. Whether playing directly through the Tesla's built-in system, via Bluetooth connection or projecting the web client of Android Auto, the options extend to USB drives and CDs. Especially, USB drives provide ample storage capacity and CDs offer a timeless and physical format, catering to varying preferences. These versatile approaches ensure Tesla drivers can effortlessly access their favorite tunes, enhancing the overall driving experience.
Note: Sidify Apple Music Converter is a shareware. It enables users to convert the first minute of each audio for sample testing. You need to purchase a license to unlock the full version.

Harper North | Staff Writer


