 Sidify TIDAL Music Converter


How to Convert Tidal Music to WAV: 5 Easy Steps (Lossless)

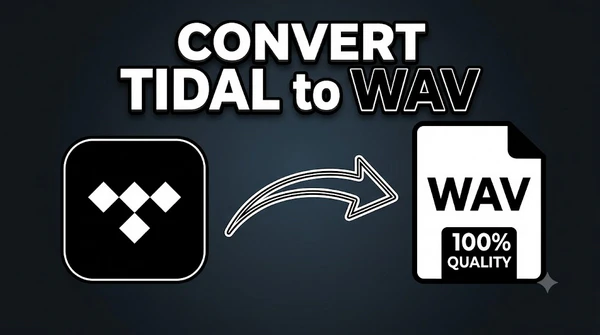
Tidal streams in lossless FLAC, but it never lets you save a track as a local WAV file. Everything you download inside the app stays locked as encrypted cache. So if you want a real Tidal to WAV file that you can drop into a DAW, load into DJ software, or burn to a CD, you need a converter that conver Tidal music into unprotected WAV audio.
This guide covers both routes. First, the fast and reliable way using a dedicated Tidal to WAV converter. Then free tools for recording Tidal music to WAV. Along the way we will also answer the question almost everyone asks before converting: WAV or FLAC? That way you do not waste disk space on the wrong format.
WAV vs FLAC: Which Should You Choose?
Both WAV and FLAC are lossless, so neither format loses any audio data. The only difference is how they store music data.
| Feature | WAV | FLAC |
|---|---|---|
| Compression | Uncompressed | Lossless compression |
| File size (4-min song) | 40 MB for CD quality, much larger for hi-res | 20–25 MB |
| Sound quality | Lossless | Identical, also lossless |
| Metadata / album art | Limited and inconsistent | Full ID3 tag support |
| Best for | Editing, mixing, mastering, CD burning, maximum compatibility | Everyday listening, large libraries, tagged collections |
Before you decide: Tidal already streams in lossless FLAC. CD‑quality tracks are 16‑bit/44.1kHz, and Hi‑Res goes up to 24‑bit/192kHz. Converting that FLAC source to WAV does not improve sound quality. WAV simply unpacks the same audio into an uncompressed format that is easier to edit. A good converter only ensures that no quality is lost during the conversion.
Choose WAV if you plan to edit the audio, for example in a DAW, a video editor, or DJ software like Rekordbox or Serato, or if you need to burn Tidal music to CD . WAV is a universal format that works with every pro audio tool without surprises.
Choose FLAC if you simply want a lossless library for listening. It delivers the exact same sound quality as WAV but takes up about half the space and keeps your tags and cover art intact.
Best Tidal to WAV Converter — Sidify Tidal Music Converter
Sidify Tidal Music Converter is a dedicated Tidal WAV converter that download Tidal track, album, or playlist as local WAV file while preserving the original quality and full ID3 tags. It’s built for people who prefer the whole Tidal playlist download over manual recording. Just add your whole library, start the conversion, and the software handles the rest.
Sidify TIDAL Music Converter
- Download and Convert Tidal music as MP3, WAV, AAC, FLAC, AIFF, and ALAC
- Keep the original quality with sample rate up to 24‑bit/192kHz
- Preserve ID3 tags: title, artist, album, artwork
- Batch convert entire playlists at high speed with built‑in web player
- Fully supports the latest Windows 11 and macOS Tahoe 26, with free updates and support
 Security verified. 2, 568,912 people have downloaded it.
How to Convert Tidal Music to WAV in 5 Steps with Sidify
Before getting started, note that Sidify offers a free trial that allows converting the first minute of each track. To unlock full-length WAV output, the full version is required. Once activated, you can convert Tidal music to high-quality WAV in just a few minutes using the steps below.
-
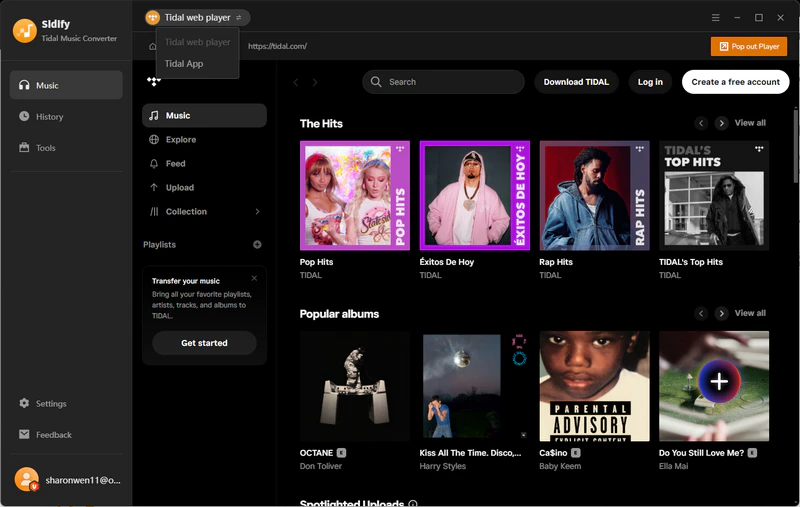
Step 1Launch Sidify Tidal Music Converter
Open Sidify on the computer. The built-in Tidal app or web player will load automatically, allowing login to a Tidal account and access to the music library.
-
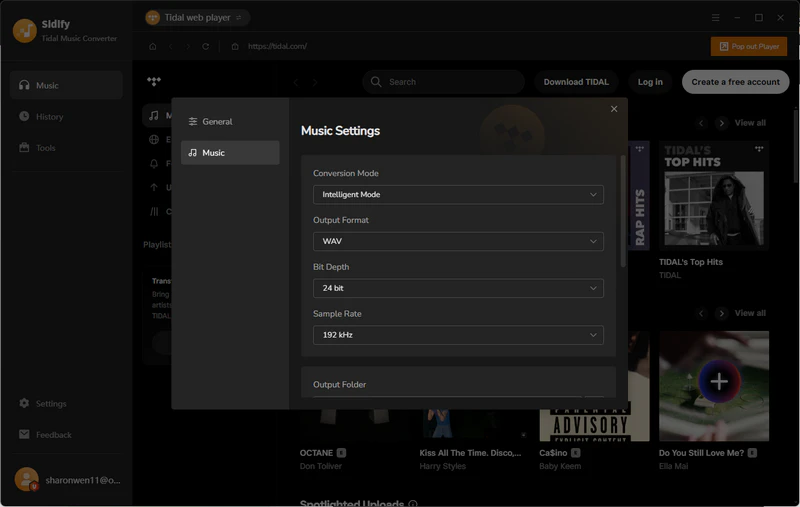
Step 2Select WAV as the output format
Click the Settings icon on the left panel and choose WAV as the output format. Audio quality can be adjusted by selecting the highest available sample rate for Hi-Res output, while the output folder can also be defined.
-
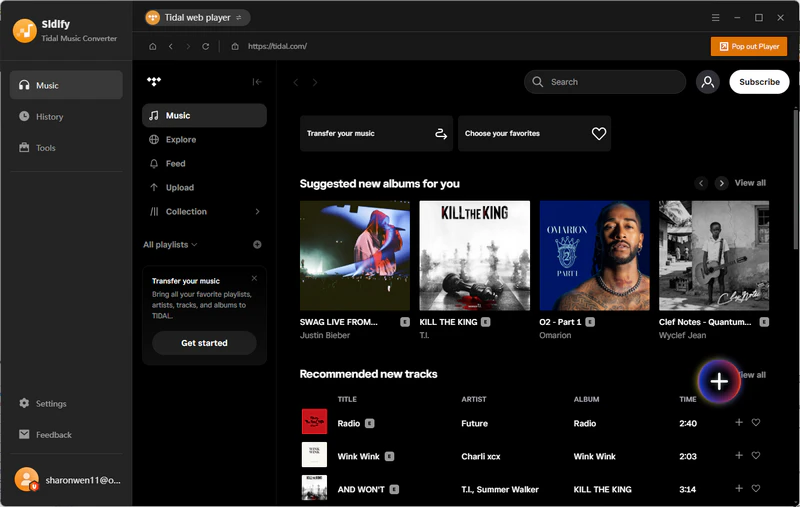
Step 3Add Tidal songs to Sidify
Browse playlists, albums, or artists inside the Tidal interface, then click Add to load tracks into Sidify. Selected songs can be confirmed for WAV conversion. Multiple playlists can be queued before starting.
-
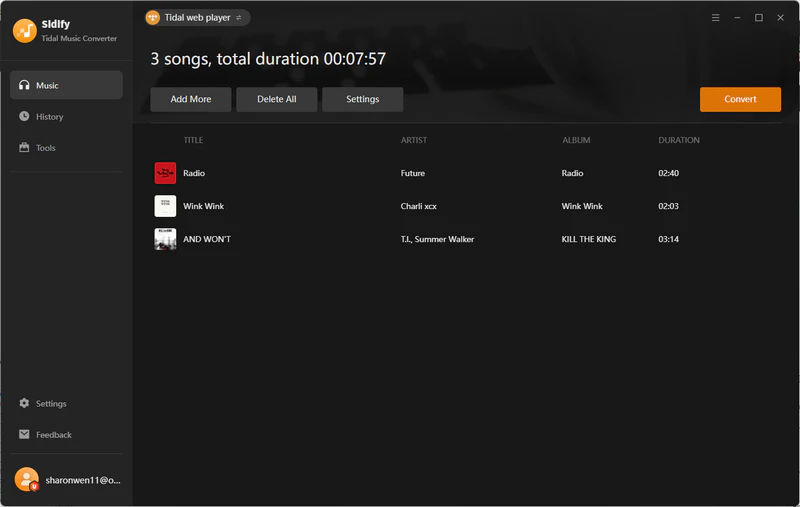
Step 4Start conversion
Click Convert to begin the process. Selected Tidal tracks will be downloaded and converted into WAV format. Larger batches may require additional processing time, while conversion continues in the background.
-
Step 5Access WAV files
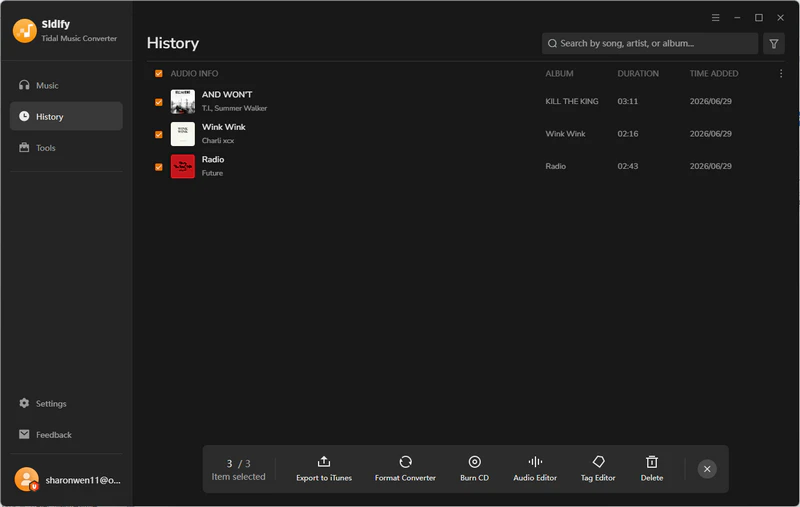
After completion, converted tracks can be viewed in the History section or accessed directly from the selected output folder. Tidal music is now saved as standard WAV files, ready for playback, editing, transfer, or use across devices, even without an active subscription.
How to Convert Tidal to WAV for Free with Audacity
If you only need a few songs and do not mind doing it the slow way, you can convert Tidal to WAV for free with Audacity, the free open‑source audio recorder. It works by recording the audio as it plays, so it is manual and one track at a time.
-
Step 1Download and install Audacity on Windows or macOS. Launch the application after installation.
-
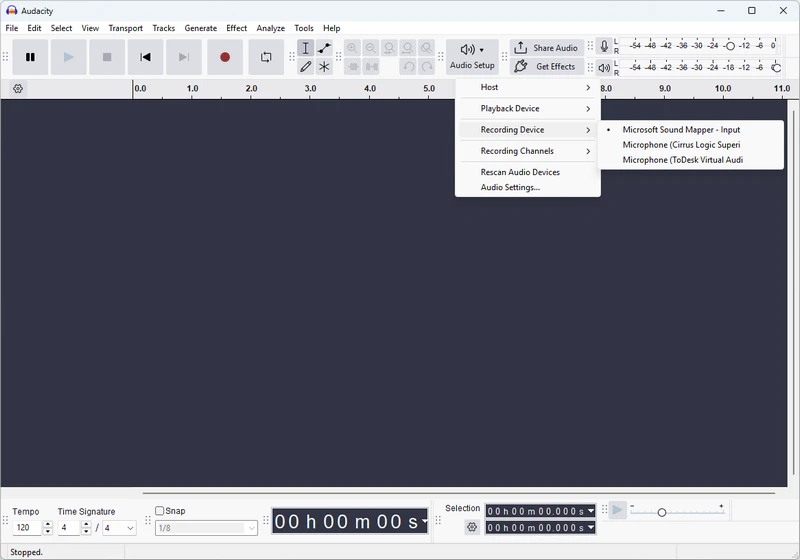
Step 2Set the recording input to your system loopback.
-
Step 3Play Tidal music and record.
-
Step 4Stop recording when the track ends, then trim any silence at the start or end.
-
Step 5Export as WAV: go to File, click Export as WAV, choose your bit depth, and save.
Frequently Asked Questions
Does converting Tidal to WAV improve the sound quality?
No. Tidal already streams in lossless FLAC, so converting to WAV simply preserves that existing quality. The conversion does not add anything to the sound. A reliable converter just makes sure no data is lost during the process.
How big are Tidal WAV files?
A 4‑minute CD‑quality WAV file at 16‑bit/44.1kHz is roughly 40 MB. Hi‑res WAV files at 24‑bit/96kHz or 192kHz can be two to four times larger, which means a full album can easily exceed several hundred megabytes.
Can I play Tidal WAV files after my subscription ends?
Yes. Once a Tidal track is converted to WAV, it becomes a standard, unprotected file stored on your local device. It will continue to play regardless of whether your Tidal subscription is active or not. .
Can I convert Tidal to WAV for free?
Yes, you can use Audacity to record the playback in real time at no cost. However, this method requires you to process each track individually, and the output files will not include ID3 tags or album art. If you only have a few songs, this free approach works fine. For larger music library, a dedicated converter is much faster and keeps your metadata intact.

Sidify TIDAL Music Converter
Download Tidal music to MP3, AAC, WAV, FLAC, AIFF, or ALAC with original quality, 10× speed, and full ID3 tags for offline use on any device.